Hammond T-Series Modifications |
Zurück zum KeyboardPartner Shop |
OverviewGeneral information about my mods |
Skill 1Simple But Effective |
Skill 2Advanced formula |
Skill 3Getting most of your stock |
Skill 4Let the tubes glow! |
Skill 5Choppin' and Dumpin' |
MIDIviceMIDIfy your organ! |
ServiceTips and Schematics |
|
|
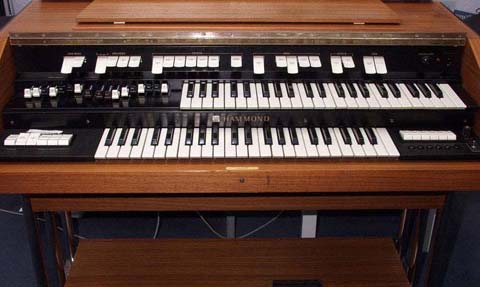
OK, let's face it: Your T-100, T-200 or T-500 sounds like a nice organ, but not like a "real" Hammond. But it has the power to do so - like my TTR-100 pictured here! |
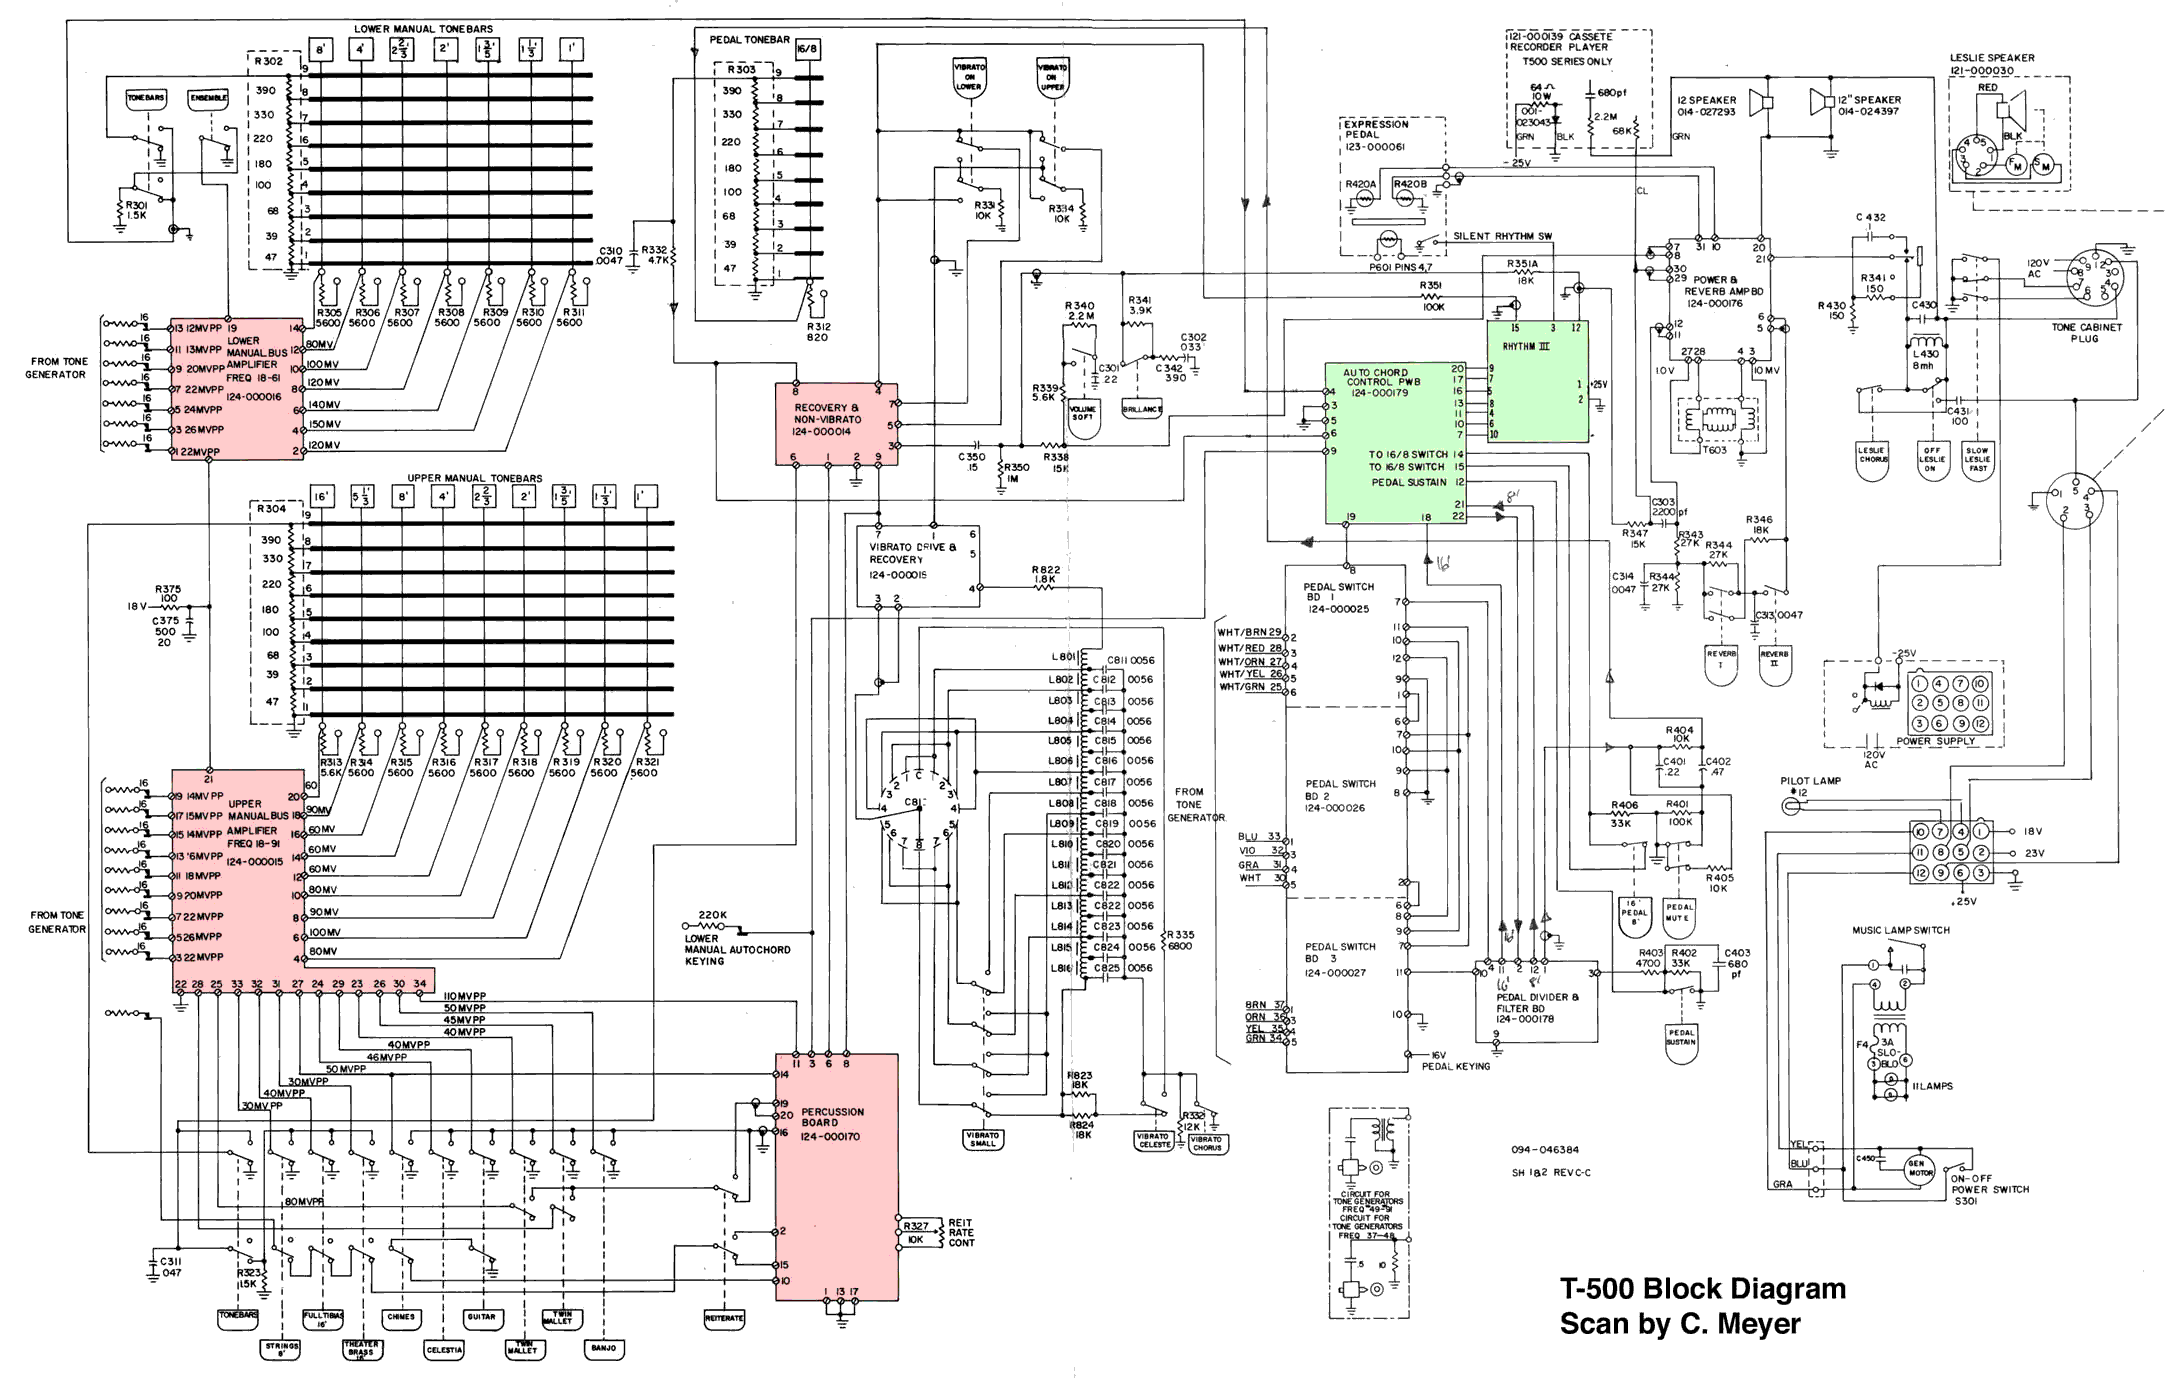
What's the issue?In the late 60s Hammond worked hard to eliminate the key click found on classical Hammonds like A-100, M-100 or the legendary B3. It was done by omitting the "manual tapering" (getting a proper tonal balance through different resistor values in the manual wiring) and, instead of that, just low-pass-filtering the signal in the recovery and preamplifier stages. As a result, the organ sounded dull and mellow -- like your T-Series spinet. Additionally, a multi-triggered percussion was introduced: Percussion was triggered on every key pressed, not only on the first one when playing legato. To add insult to injury, no single harmonics percussion was available any longer, but strange and barely unusable voices like "banjo", "marimba" and "guitar". What to do?Modifying your spinet requires some technical skills. There are simple modifications like removing filter capacitors, but there are also more challenging mods like replacing the recovery preamp PCB (printed circuit board). First download the T-500 block diagram. T-100 and T-200 diagrams are quite similar, lacking the Rhythm III unit (T-200) or the leslie (T-100). Blocks marked red are bound to be modified, those marked green may be removed if you don't want the Rhythm III (rewiring necessary!). If you don't know what all the symbols mean, don't go any further and ask someone else! All my diagrams/schematics can be found here. I suggest buying a complete service manual if you don't have it already. Mr Spitzer from Hammondstore Germany offers nicely made PDF service manuals for most Hammonds. Skill 1 - Simple But EffectiveThese first modifications are very easy. They lead to a much crispier sound on the first 4 drawbars and will add a nice key click. Skill 2 - Advanced formulaGet rid off that multi-triggered percussion and that dreaded "click filter" on the recovery and intermediate amp board to obtain a B3-like frequency response! Skill 3 - Getting most of your stockUsable percussion and preset voices. A must-have. Skill 4 - Let the tubes glow!Build a real tube preamplifier for your T-series spinet which is pin-to-pin compatible with Hammond's dreaded recovery amp board! Skill 5 - Hammer & glue requiredSome suggestions for chopping a home-style cabinet.. A worn & torn organ cabinet may require a professional person to restore. If you need Hammond and Leslie decals for your cabinet work, get my Hammond EPS logo or my Leslie EPS logo and carry it to a signmaker's shop. Their Graphtec cutting plotter will make a decent decal for you - cheap! Skill 5 1/3 - Impress women & your neighbour with your spinetThis ain't easy, but can be done, like these pictures demonstrate. Check out the girl's make-up and the organist's socks. Skill 6 - MIDIfy your organ!MIDI output interface for upper and lower manual, working with a dirt-cheap 8031 and single-sided PCBs only. Some PCB etching required. General service suggestionsWhat to do if the amplifier is noisy or a tone is missing. Schematics PageAll my Hammond and Leslie schematics and tables from various sources all over the net. Back to ToneWheel main page |